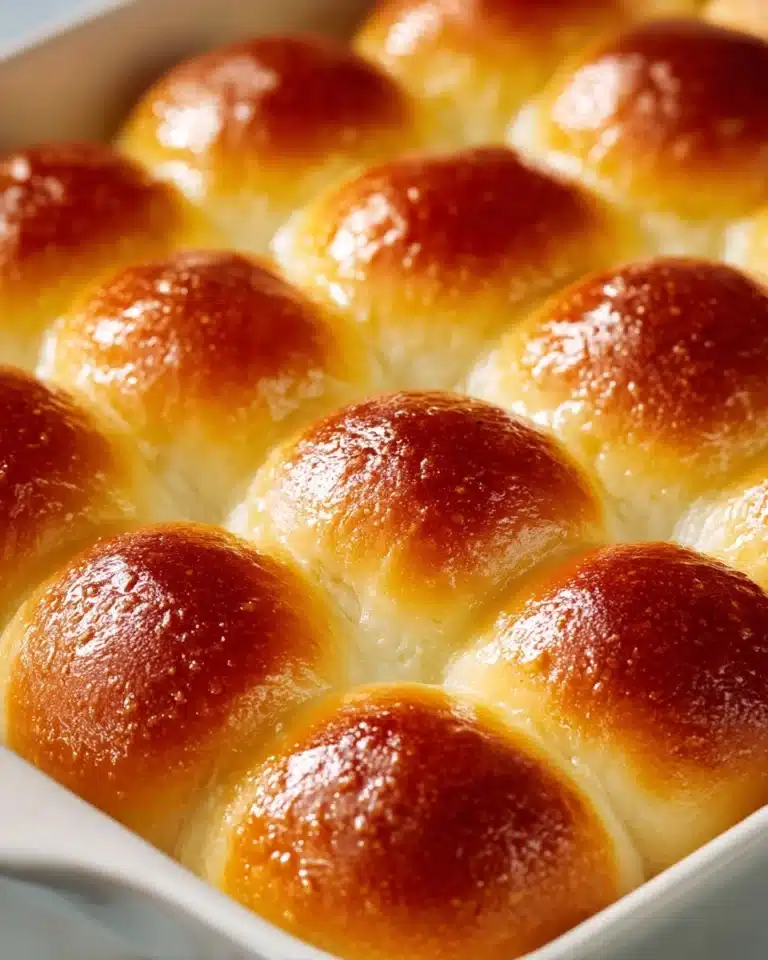

If you have ever craved that soft, pillowy bread that perfectly complements spicy Indian street food, then you are going to love this Easy Pav Buns Recipe. These buns are not just any ordinary bread; they are a delightful blend of milk and butter that creates a tender crumb and a golden crust. Whether you want to use them as dinner rolls, slider buns, or alongside your favorite fritters and vegetable curries, these pav buns bring a comforting warmth and a touch of homemade magic to your table. Trust me, once you try making this at home, you’ll never want store-bought pav again!
Ingredients You’ll Need

Creating the perfect Easy Pav Buns Recipe hinges on a handful of simple ingredients that you likely already have in your kitchen. Each element plays a crucial role — from the creamy milk that tenderizes the dough to the butter that adds luscious richness, and the yeast that gives the buns their fluffy rise. The magic is truly in the balance of these essentials.
- Flour (3 cups / 350g): Use all-purpose flour for soft and airy buns, and weighing it ensures consistency.
- Milk (1 cup / 240g): Warm milk enriches the dough and makes it wonderfully tender.
- Sugar (1 tbsp / 15g): Just enough to feed the yeast and add a subtle sweetness to the crust.
- Active Dry Yeast (2 1/4 tsp / 7g): The key to a perfect rise, ensuring that soft, fluffy texture.
- Fine Sea Salt (1 tsp / 7g): A pinch to enhance all the flavors and balance the sweetness.
- Butter (3 tbsp): Adds a rich flavor and tender crumb; some goes into the dough and some for brushing the tops.
How to Make Easy Pav Buns Recipe
Step 1: Activate the Yeast
Start by warming your milk gently, just warm to the touch around 110°F, ensuring it’s not too hot to kill the yeast. Take a quarter cup of that milk and stir in the sugar, then sprinkle the active dry yeast over the surface. Let this mixture sit in a warm spot for 5 to 10 minutes until it’s frothy and bubbling, which tells you your yeast is alive and ready to work its magic.
Step 2: Mix and Knead the Dough
In a large bowl, combine the flour and salt evenly. Create a well in the center and pour in the activated yeast mixture. Gradually incorporate the flour from the sides, blending in the remaining warm milk as you go, until you bring all the ingredients together into a dough. Add two tablespoons of softened butter and knead the dough for 10 to 15 minutes until it feels soft, smooth, and pliable, which is crucial for that classic tender crumb.
Step 3: Let the Dough Rise
Prepare a large bowl by lightly coating it with oil to prevent sticking. Shape the dough into a smooth ball and place it inside, making sure it has plenty of room to grow—aim for about three times the dough’s size. Cover with a clean cloth and let it rise in a warm area until doubled in volume, about an hour. This rise gives the buns their airy softness.
Step 4: Shape the Pav Buns
Once the dough has doubled, gently punch it down to release excess air. Divide it into 12 equal portions and roll each into a smooth, round ball. Arrange these balls side by side in an ovenproof container, just touching each other. Cover them again and let them rise a second time for 20 to 30 minutes until nearly doubled.
Step 5: Bake to Perfection
Preheat your oven to 375°F (190°C). Melt the remaining tablespoon of butter and lightly brush it over the tops of the risen buns for a beautiful golden crust. Bake them for about 20 minutes until they turn wonderfully brown on top. When done, remove them from the oven and give each bun another butter brush—it’s a final touch that keeps them tender and irresistibly rich.
How to Serve Easy Pav Buns Recipe

Garnishes
Pav buns are delightfully simple, but a little garnish can elevate your presentation. Try sprinkling some sesame seeds or nigella seeds on top before baking for an extra layer of flavor and texture. A light dusting of butter immediately after baking gives them that homemade shine and moisture.
Side Dishes
These buns shine alongside spicy Indian street food staples like vada pav, pav bhaji, or even chole (spicy chickpea curry). Their subtle buttery flavor and soft texture make them perfect for dipping or sandwiching spicy and tangy fillings. They also pair beautifully with vegetable fritters or bean dishes, balancing bold flavors with their smooth, tender crumb.
Creative Ways to Present
Think beyond the traditional! Use these pav buns as slider buns filled with grilled veggies, paneer, or even mini kebabs for a fun twist on Indian flavors. You can also slice them open, toast lightly with garlic butter, and serve with a variety of chutneys and pickles for a flavorful platter perfect for parties or family gatherings.
Make Ahead and Storage
Storing Leftovers
After enjoying your freshly baked pav buns, wrap any leftovers tightly in plastic wrap or store in an airtight container. Kept at room temperature, they stay soft and delicious for up to 2 days. Avoid refrigeration, as it can dry out the buns.
Freezing
If you want to save pav buns for longer, they freeze beautifully. Wrap each bun individually in cling film and store in an airtight freezer bag. They can last up to 3 months frozen without losing their soft texture. It’s a handy way to enjoy the Easy Pav Buns Recipe on demand.
Reheating
To bring frozen or leftover pav buns back to life, gently warm them in a preheated oven at 325°F (160°C) for 5 to 7 minutes, optionally brushing with a bit of butter before heating. You can also microwave them covered with a damp paper towel for 20-30 seconds if you are short on time, which helps retain moisture.
FAQs
Can I use water instead of milk in this Easy Pav Buns Recipe?
Yes, you can substitute water for milk, but keep in mind the buns won’t be as soft or tender. Milk enriches the dough with fat and sugars, lending a richer flavor and softer texture, so use it if possible for the best results.
Do I need to weigh the flour or can I use measuring cups?
Measuring by weight is more accurate because cup measurements can vary depending on how flour is scooped. Weighing the flour ensures consistent results every time you make this Easy Pav Buns Recipe.
How long does it take for the dough to rise?
Typically, you’ll want the dough to double in size in about one hour during the first rise and then let the shaped buns rise for about 20-30 minutes. The exact time can vary depending on room temperature—keep the dough in a warm spot for best results.
Can I make these buns vegan?
To make vegan pav buns, substitute the butter with a plant-based alternative and use plant milk instead of dairy milk. The texture might be slightly different but will still be delicious and soft.
What can I do if my buns don’t rise well?
If your buns don’t rise properly, it’s usually due to inactive yeast or temperature issues. Make sure your milk is warm but not hot when activating the yeast, and always check the expiration date on your yeast packet for freshness.
Final Thoughts
There’s something truly special about making your own pav buns from scratch, and this Easy Pav Buns Recipe brings that joy right into your kitchen. Whether you’re new to bread baking or a seasoned pro, these buns offer a soft, buttery canvas perfect for countless delicious meals. So grab your ingredients, roll up your sleeves, and get ready to impress your friends and family with the warmest, most tender buns you’ve ever tasted!
Print
Easy Pav Buns Recipe
- Total Time: 2 hours 30 minutes
- Yield: 12 buns
Description
Easy Pav Buns are soft, fluffy, and slightly sweet Indian bread rolls made with milk and butter. Perfect as slider buns or dinner rolls, these classic pav buns complement spicy vegetable dishes and fritters. The recipe involves yeast activation, kneading, rising, and baking to achieve perfect texture and flavor.
Ingredients
Dry Ingredients
- 3 cups Flour (350g)
- 1 tsp Fine Sea Salt (7g)
- 1 tbsp Sugar (15g)
- 2 1/4 tsp Active Dry Yeast (1 packet, 7g)
Wet Ingredients
- 1 cup Milk (240g), warmed to 110°F
- 3 tbsp Butter (unsalted), softened (divided: 2 tbsp for dough, 1 tbsp for brushing)
Instructions
- Activate Yeast: Warm the milk to around 110°F, take 1/4 cup and mix it with 1 tbsp sugar. Sprinkle the yeast over this mixture and let it sit in a warm place for 5-10 minutes until it becomes frothy, indicating the yeast is active.
- Mix and Knead Dough: In a large bowl, combine the flour and salt. Make a well in the center and pour in the activated yeast mixture. Gradually mix in the remaining milk as needed to bring the mixture together. Add 2 tablespoons of softened butter and knead the dough for 10-15 minutes until it’s soft, smooth, and pliable.
- First Rise: Lightly coat a large bowl with oil. Shape the dough into a smooth ball and place it in the bowl. Cover and let it rise in a warm place until doubled in volume, about 1 hour.
- Shape Buns: Punch down the risen dough, then divide it into 12 equal portions. Shape each piece into a smooth ball.
- Second Rise: Arrange the dough balls side by side in a greased ovenproof container so the buns just touch. Cover and allow to rise until nearly doubled, about 20-30 minutes.
- Preheat and Prepare: Preheat the oven to 375°F (190°C). Melt the remaining 1 tablespoon of butter and brush it over the tops of the risen buns.
- Bake: Bake the buns in the preheated oven for about 20 minutes until the tops are golden brown.
- Finish: Remove the baked buns from the oven and immediately brush the tops with more butter. Let them cool in the pan for 5 minutes, then transfer to a cooling rack to cool completely.
- Storage: If not consuming within a day, wrap the rolls individually and freeze for later use.
Notes
- Volume measurements may vary slightly depending on flour type and measuring method; weighing ingredients yields more consistent results.
- Milk can be substituted with water, but the buns will be less tender and rich.
- When kneading, adjust the amount of milk/water based on dough texture rather than strict measurements, especially when using volume measurements.
- Prep Time: 30 minutes
- Cook Time: 20 minutes
- Category: Bread
- Method: Baking
- Cuisine: Indian