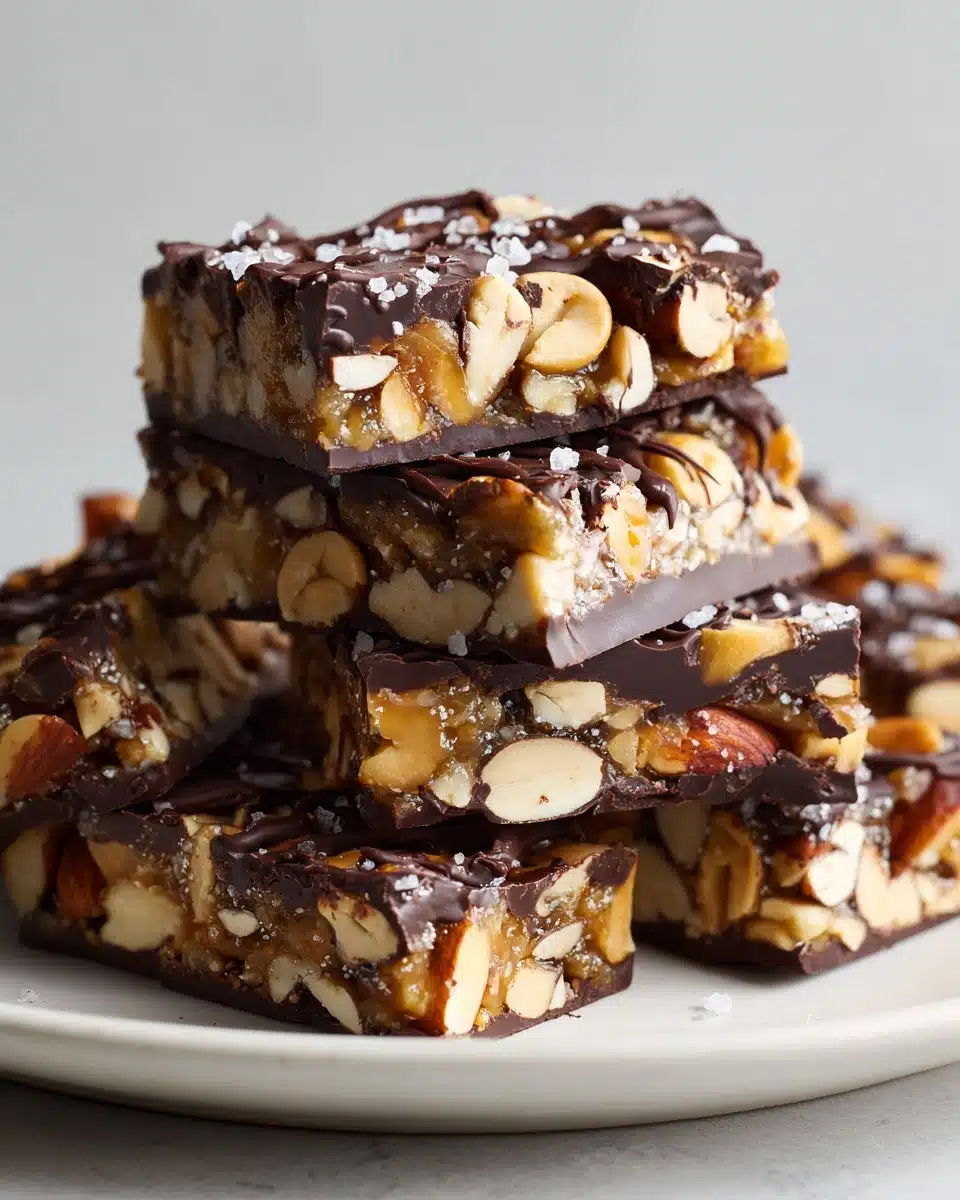
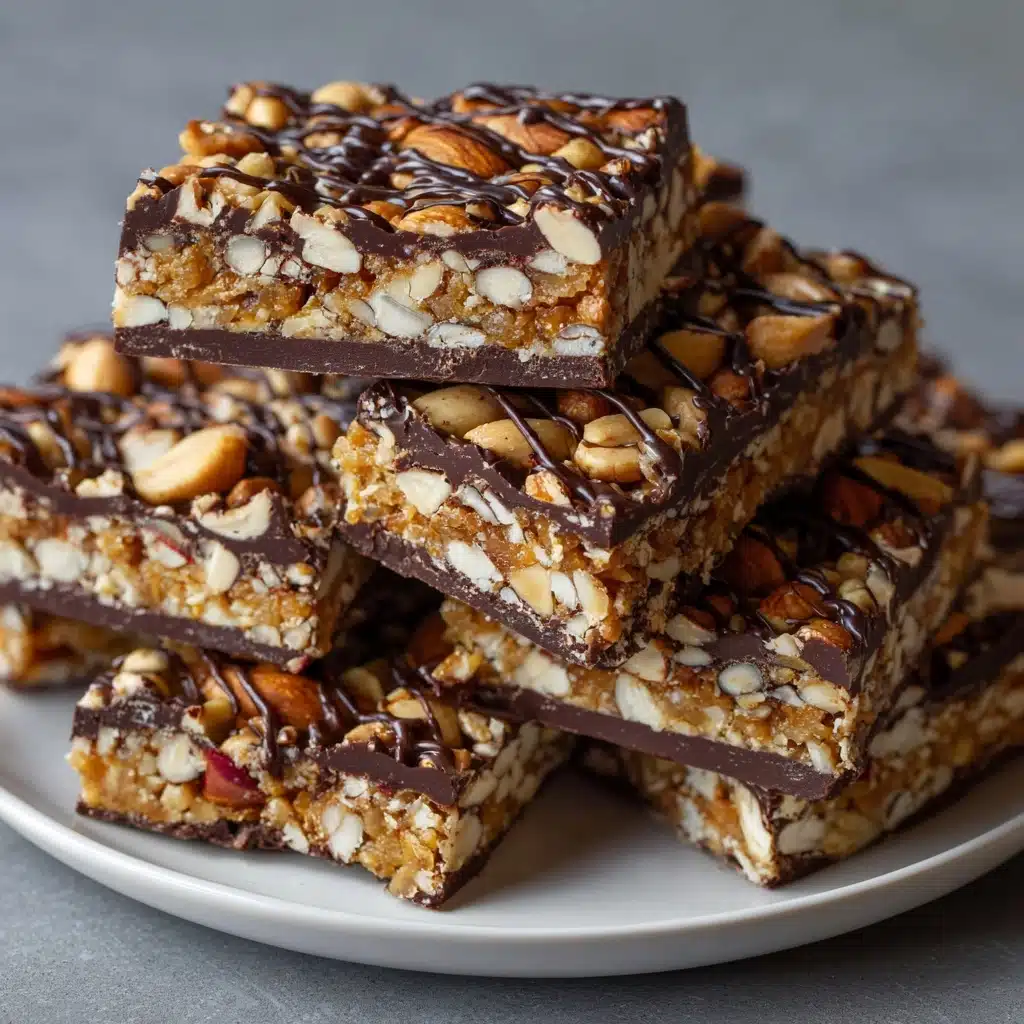
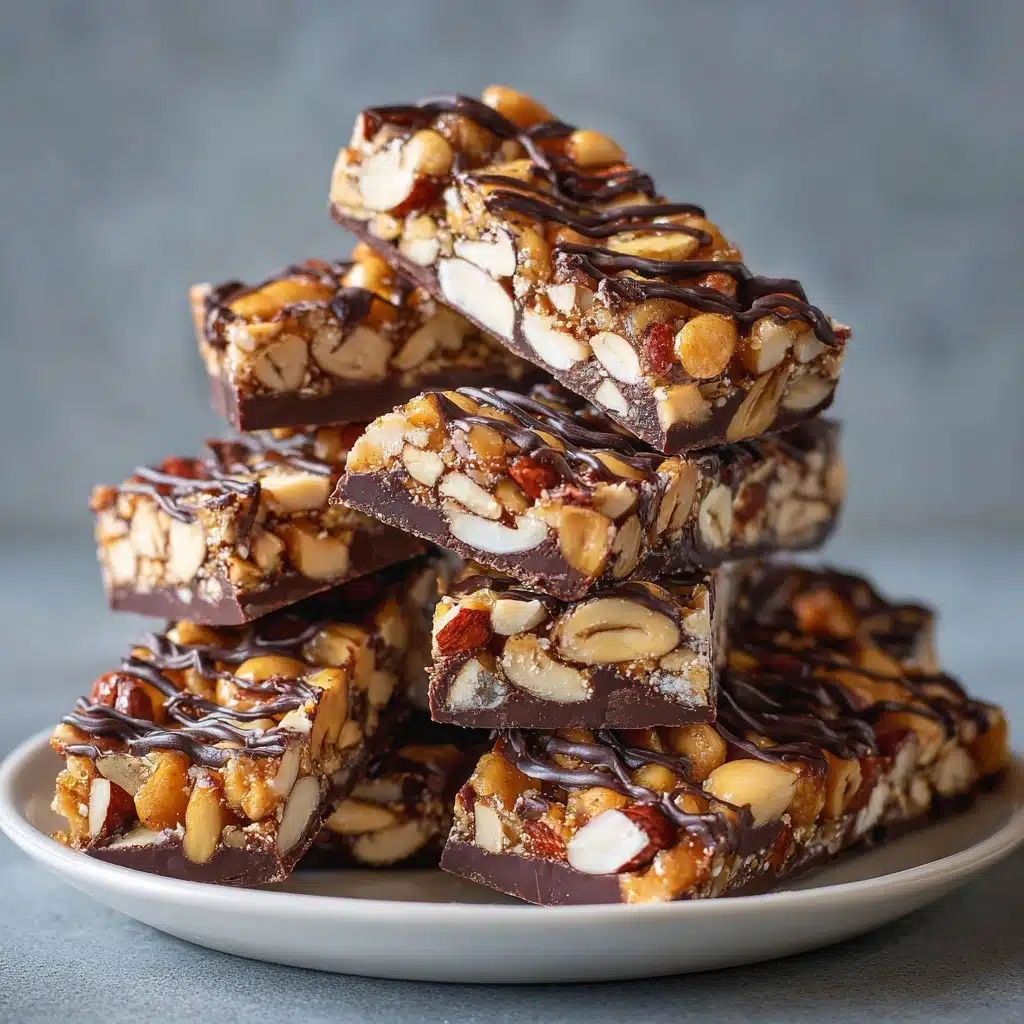
If you’ve ever bitten into a store-bought KIND bar and thought, “I wish I could make these at home!”, this is the recipe for you. These Chewy Granola Bars with Nuts, Almonds, and Chocolate Drizzle have fewer than 10 ingredients, making them wonderfully simple but truly irresistible. With a glossy dark chocolate coating, a pinch of sea salt, and a pleasing chewy-crunchy texture, every bite delivers balanced flavors and energy-packed nutrition. Perfect for gluten-free snacking, these bars are easy to whip up and even easier to enjoy.
Ingredients You’ll Need
Simplicity is key here: they have fewer than 10 ingredients, but each one is thoughtfully chosen to bring out the best mix of crunch, sweetness, and indulgence. Every scoop adds a layer of flavor or texture you’ll notice in the final bite!
- Unsalted nuts (cashews, peanuts, almonds): The main event bringing that irresistible, hearty crunch and rich flavor.
- Puffed rice: Adds airy crispness, making the bars light without ever being chalky or dense.
- Brown rice syrup: This sticky, subtly sweet syrup binds everything together—use honey for a touch more sweetness if needed.
- Vanilla extract: Elevates all the nutty notes and adds a homey warmth you’ll love.
- Sea salt: Just a pinch cuts the sweetness and boosts every nut’s natural flavor; don’t skip it!
- Dark chocolate chips: Melting these transforms your bars into a chocolate-lovers’ dream—plus, that smooth finish is gorgeous.
- Coconut oil: Blending this into your chocolate drizzle makes the coating glossy and helps it set snappily.
- Optional flaky salt for topping: For ultimate salty-sweet sparkle and crunch.
How to Make They have fewer than 10
Step 1: Toast the Nuts
Preheat your oven to 325˚F (160˚C). Spread all your nuts out in a single layer on a rimmed sheet pan and pop them in the oven for 5 to 8 minutes. You’re looking for a toasty golden hue and that unmistakable nutty aroma—this quick step deepens their flavors and sets the stage for a seriously tasty bar!
Step 2: Line and Prep Your Pan
While the nuts cool down, grab your trusty 8×8-inch pan, line it with parchment paper, and set it aside. Parchment is your best friend for sticky granola bars—it ensures nothing sticks and cutting the bars later is a total breeze.
Step 3: Mix the Dry Ingredients
In a large mixing bowl, combine the warm, toasted nuts with the puffed rice. Toss everything together so you have a nice distribution; this guarantees each bar is packed with a satisfying mix of textures.
Step 4: Create and Add the Binder
Pour your brown rice syrup into a microwave-safe bowl and gently heat it for about 30 seconds. This makes it easier to mix. Whisk in the vanilla extract and sea salt until smooth, then pour this syrupy goodness over your nut mixture. Stir until every piece is evenly coated—this sticky mix is what holds your bars together.
Step 5: Press and Bake the Bars
Transfer the mixture to your lined pan. Use a spatula, or your clean hands, to press it into a firm, even layer. Pop it in the oven for 18 to 20 minutes until everything looks golden and smells amazing. Let the baked slab cool for about 30 minutes.
Step 6: Cut into Bars
Once mostly cool, lift the granola slab out onto a cutting board. Slice in half lengthwise, then cut each half into 5 or 6 bars. Patience is key—the bars firm up as they finish cooling, making slicing a breeze.
Step 7: Dip and Drizzle with Chocolate
Melt your dark chocolate chips with the coconut oil in a microwave-safe bowl, stirring every 30 seconds until smooth and glossy. Dip the bottom of each bar in chocolate and lay them on a parchment-lined baking sheet. Drizzle the tops with more chocolate, then sprinkle with a little flaky salt if you’re feeling fancy. Let them cool in the fridge so the chocolate sets beautifully—almost time to taste!
How to Serve They have fewer than 10
Garnishes
Bring out the eye appeal and flavor by adding an extra sprinkle of flaky sea salt, a dusting of cocoa powder, or even a handful of toasted coconut. These small finishes really make it look like a treat straight from your favorite café!
Side Dishes
Even though these bars are stars on their own, they play well with others. Try pairing one with a creamy Greek yogurt parfait for breakfast, or alongside fresh berries for an afternoon pick-me-up that’ll keep you energized.
Creative Ways to Present
For a party platter or after-school surprise, stack the bars in a colorful tin with parchment in between—nobody ever guesses they have fewer than 10 ingredients! Or, wrap individual bars in wax paper and tie with a twine bow for an adorable homemade gift.
Make Ahead and Storage
Storing Leftovers
Once the chocolate is set, keep your bars in an airtight container at room temperature. Separate layers with parchment so they don’t stick together. They’ll stay fresh and fabulous for up to a week, but chances are they’ll disappear much sooner.
Freezing
Yes, you can absolutely freeze these granola treats! Stack with parchment between bars, seal in a freezer bag or airtight box, and stash them away. When hunger hits, just grab one—they have fewer than 10 ingredients so there’s nothing fussy to thaw. They keep beautifully for several months.
Reheating
If you love that gooey chocolate feel, take a bar right from the fridge or freezer and zap it for 5 to 10 seconds in the microwave. The chocolate softens just enough to taste like a bakery-fresh indulgence all over again.
FAQs
Can I use a different syrup if I don’t have brown rice syrup?
Sure thing! Although brown rice syrup gives the bars their characteristic chewy hold, honey works well for a lightly stickier bar, and maple syrup can offer richer sweetness. Since they have fewer than 10 core pantry staples, swapping the binder keeps things easy!
How do I avoid the chocolate dripping and making a mess?
Simply let any excess chocolate drip off the bars before setting them on your lined baking sheet. This step helps ensure the chocolate sets neatly and your bars look as perfect as they taste.
Can I customize the nuts or add mix-ins?
Absolutely! Experiment with pecans, walnuts, or even pistachios. Just keep the total nut measurement the same so you keep the chewy balance. You could even sneak in seeds or dried fruit, but since they have fewer than 10 essentials, each swap shines.
Are these bars truly gluten free?
Yes, as long as you use gluten free puffed rice and check your chocolate chips and syrups! Every ingredient here is chosen so anyone can enjoy these bars—snacks shouldn’t exclude anyone at the table.
How can I make sure my bars hold together?
Firmly press the mixture into the pan, and be sure your syrup fully coats the dry ingredients. This even mix—plus adequate baking time—gives your bars their ideal chew and holds them together, even though they have fewer than 10 stabilizers.
Final Thoughts
Grab your mixing bowl and a handful of simple ingredients—they have fewer than 10, but every single one brings big, beautiful flavor. These homemade granola bars are the kind of treat you’ll crave again and again, so don’t be surprised if you end up with a new go-to snack to share (or keep all to yourself!). Happy snacking!
Print
Chewy granola bars with nuts, almonds, and chocolate drizzle,
- Total Time: 1 hour 15 minutes
- Yield: 10-12 bars
- Diet: Gluten Free
Description
These homemade Dark Chocolate and Sea Salt Nut Bars are crunchy, perfectly salty, and delicious. They have fewer than 10 ingredients, and the recipe is super simple and easy to follow! If you love KIND bars, this is the recipe for you!
Ingredients
Unsalted Nuts:
- 3/4 cup cashews
- 3/4 cup peanuts
- 1 cup almonds
Puffed Rice:
- 1/2 cup
Brown Rice Syrup:
- 1/4 cup
Vanilla Extract:
- 1 1/2 teaspoons
Sea Salt:
- 1/2 teaspoon
Dark Chocolate Chips:
- 1 cup
Coconut Oil:
- 2 teaspoons
Optional:
- Flaky salt for topping
Instructions
- Preheat oven to 325˚F / 160˚C. Spread the nuts on a sheet pan and bake until fragrant.
- Line pan with parchment paper.
- Combine nuts and puffed rice in a bowl.
- Microwave brown rice syrup, vanilla, and salt, then pour over nut mixture.
- Press mixture into pan and bake.
- Cool, cut into bars.
- Melt chocolate and oil, dip bars, drizzle with chocolate, top with salt.
- Refrigerate until set and enjoy!
Notes
- If you can’t find brown rice syrup, honey can be used.
- Store in an airtight container at room temperature or freezer, separated by parchment paper layers.
- Line pan with parchment and cooking spray to prevent sticking.
- Adding coconut oil to chocolate helps with consistency.
- Let excess chocolate drip off to prevent large chocolate ‘foot’.
- Prep Time: 20 minutes
- Cook Time: 20 minutes
- Category: Snacks
- Method: Oven
- Cuisine: American
Nutrition
- Serving Size: 1 bar
- Calories: 248
- Sugar: 10.3 g
- Sodium: 68.2 mg
- Fat: 18.1 g
- Carbohydrates: 17.3 g
- Fiber: 3.2 g
- Protein: 6.9 g

